Those who love Android, that is only for the easily customizable system. Android lets users play with the device according to their preferences. You can easily tweak, mod, and customize your Android by some great tools.
But if you’re not an advanced Android user, you might lose all your device data. For this reason, we always recommend to backup all of your data at first. This will reduce your time and effort mostly.
While installing any Stock or Custom ROM or rooting or customizing your device, if you get any error, you may lose all your data by no time. In all of those cases, the Nandroid Backup and Restore will come in handy.
The Nandroid Backup
The Nandroid word is written as NANDroid. It’s taken from the bags of NAND flash storage which is the type of permanent storage for your Android device. In a single line, we can say backing up a perfect mirror image of the Android device called NANDroid.
A Nandroid backup is a standard directory structure where you can backup all of your data including the system files also. Nandroid Backup can be used to restore your data as well to an earlier position easily via the recovery. For the rooted devices, this is the best option to take backup and restore on Android.
For Non-Rooted Devices: How to Backup Your Android Device Data Without Root (2019)
Pre-Requirements
- In order to take Nandroid Backup and restore on your Android device –
- make sure that your device does have Root access.
- Need to already have installed any custom recovery tool (CWM, TWRP).
You can follow below guide to install Custom Recovery and Root:
How to Root Android using SuperSU ZIP and Custom Recovery
- Keep at least 50%-60% battery juice on your device to prevent occasional shutdown between the process.
- Follow the full guide properly, or else it may lead to brick your device.
- TheDroidTimes site won’t be responsible for any damage during following the process.
Steps to take Nandroid Backup via Custom Recovery
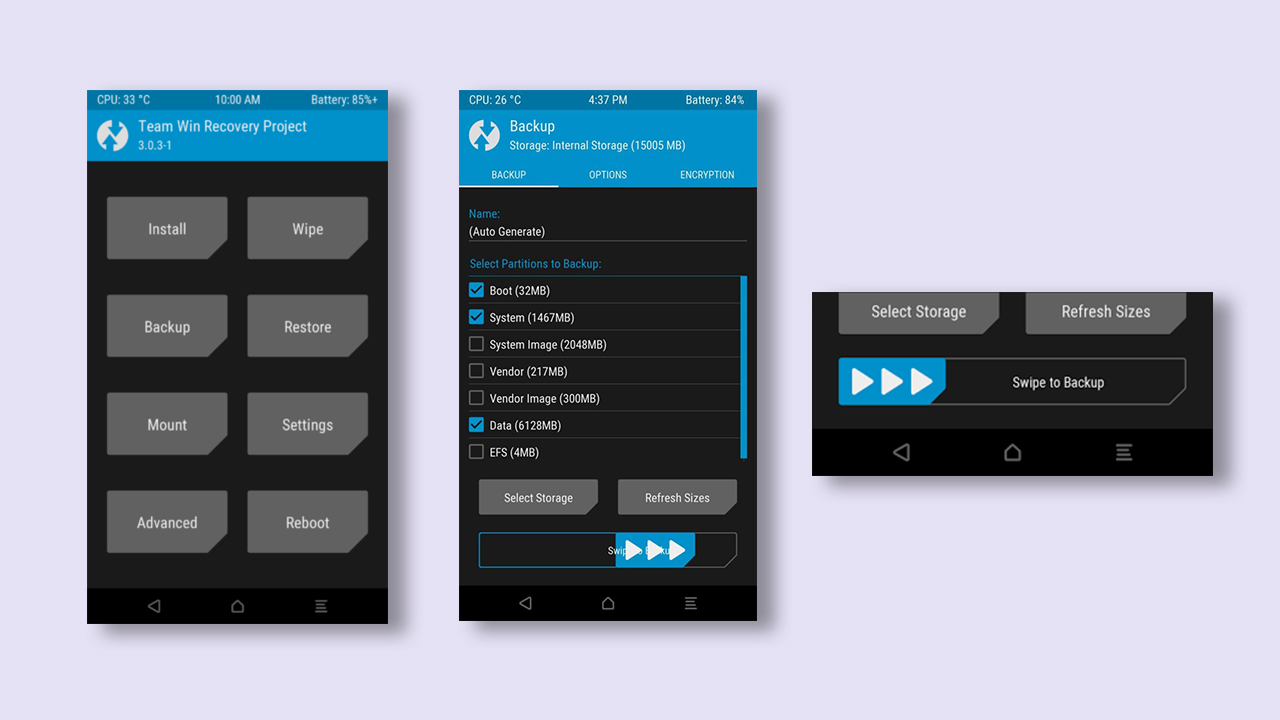
- First, press and hold the Volume Down + Power button simultaneously for a few seconds until you boot into TWRP Recovery mode.
- Now, tap on Backup then select the partitions that you want to back up. [If you’re not sure which partition to choose, simply go with the default selections]
- Swipe to the right side to start the Backup process.
- Now, wait for complete backup as it will take some time.
- Once the backup is completed, reboot your device from the option called Reboot Now.
- That’s it. Now, you’ve successfully backed up your device data by Nandroid.
Tip: Transfer your backup file to any PC/Laptop to keep the backup file safe (whenever required).
Steps to Restore Nandroid Backup on Android
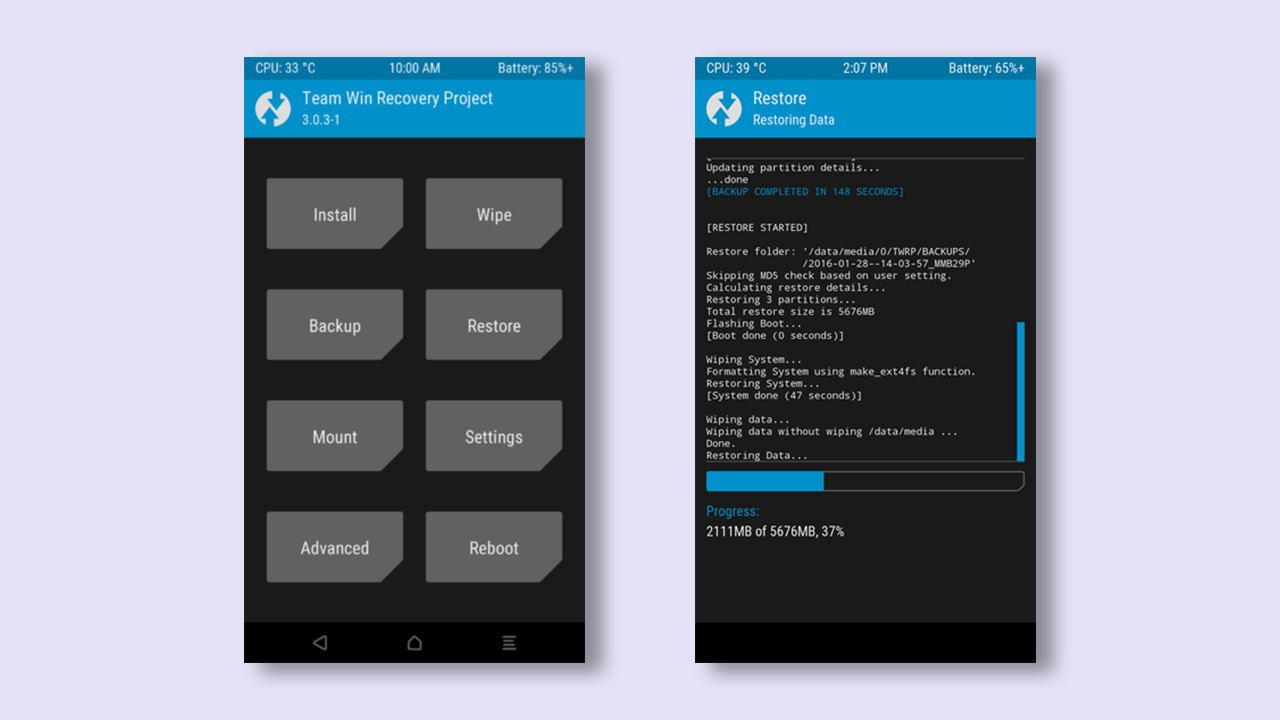
- Press and hold the Volume Down button + Power button at the same time until you get into TWRP Recovery screen.
- Transfer your backup file to your device.
- Tap on Restore and select the Backup file > Swipe to start restoring process.
- Once restoring is completed, Reboot your device from the main menu.
- You’re done! Enjoy 😀
Hope you found this article useful. Feel free to comment down below if you’ve any queries or issues.
Instead of just using the default settings, I would suggest using the default settings + EFS. It is entirely possible that your EFS partition can become corrupted making it so you have No Service 24/7. The simplest solution to this issue is to flash a known good backup, otherwise you will have to go through a lot of hoops to get back to where you were with a working EFS.
Your suggestion includes the recommendation of using the default setting itself. We will always suggest the default backup and restore process. It’s a time-saving one-click action. Otherwise, if the system file and boot file doesn’t matter to you [flashoholic], we’ll even suggest keeping a backup of only the documents and media files to google drive and let the job done.