Samsung has started rolling out the stable Android Pie-based One UI update for the Samsung Galaxy S9/S9+ devices. In this guide, we will provide you with the guide with how to install Galaxy S9/S9+ Android Pie update (One UI).
Android 9.0 Pie-based One UI for Samsung Galaxy S9/S9+
The process can be easily done by flashing the latest Android Pie stock firmware using Odin tool or sideload the OTA package using stock recovery. Samsung recently started the One UI beta testing program for the Galaxy Note 9, Galaxy S9/S9+. Even the Galaxy S8/S8+ and Note 8 device are expected to receive the One UI Pie update soon.

The stable Android Pie-based One UI update comes with the build number of G960FXXU2CSB3 and G965FXXU2CSA2 for the Galaxy S9/S9+ devices (Exynos). While the Snapdragon chipset powered Samsung Galaxy S9/S9+ devices receiving the OTA update with the build number of G960USQU3CSAB and G965USQU3CSAB.
The official OTA update has already been started rolling out in Europe, Italy, Germany, and Switzerland regions. You can also check the update manually from device Settings -> System Updates option.
Read More: How to install Samsung Stock Firmware using Odin Tool [2019]
Since the update is an incremental process and will be available via batches globally, it can take a few days/weeks possibly. However, if you’re an avid user or an advanced user, you can follow the steps mentioned below to install Samsung Galaxy S9/S9+ Android Pie Update based on One UI manually.
All you need to flash the available One UI firmware based on Android 9 Pie via Odin flash tool. The method will work properly if you have installed the One UI Beta or the latest Android Oreo firmware on your devices.
Android Pie One UI for Galaxy S9 Changelogs:
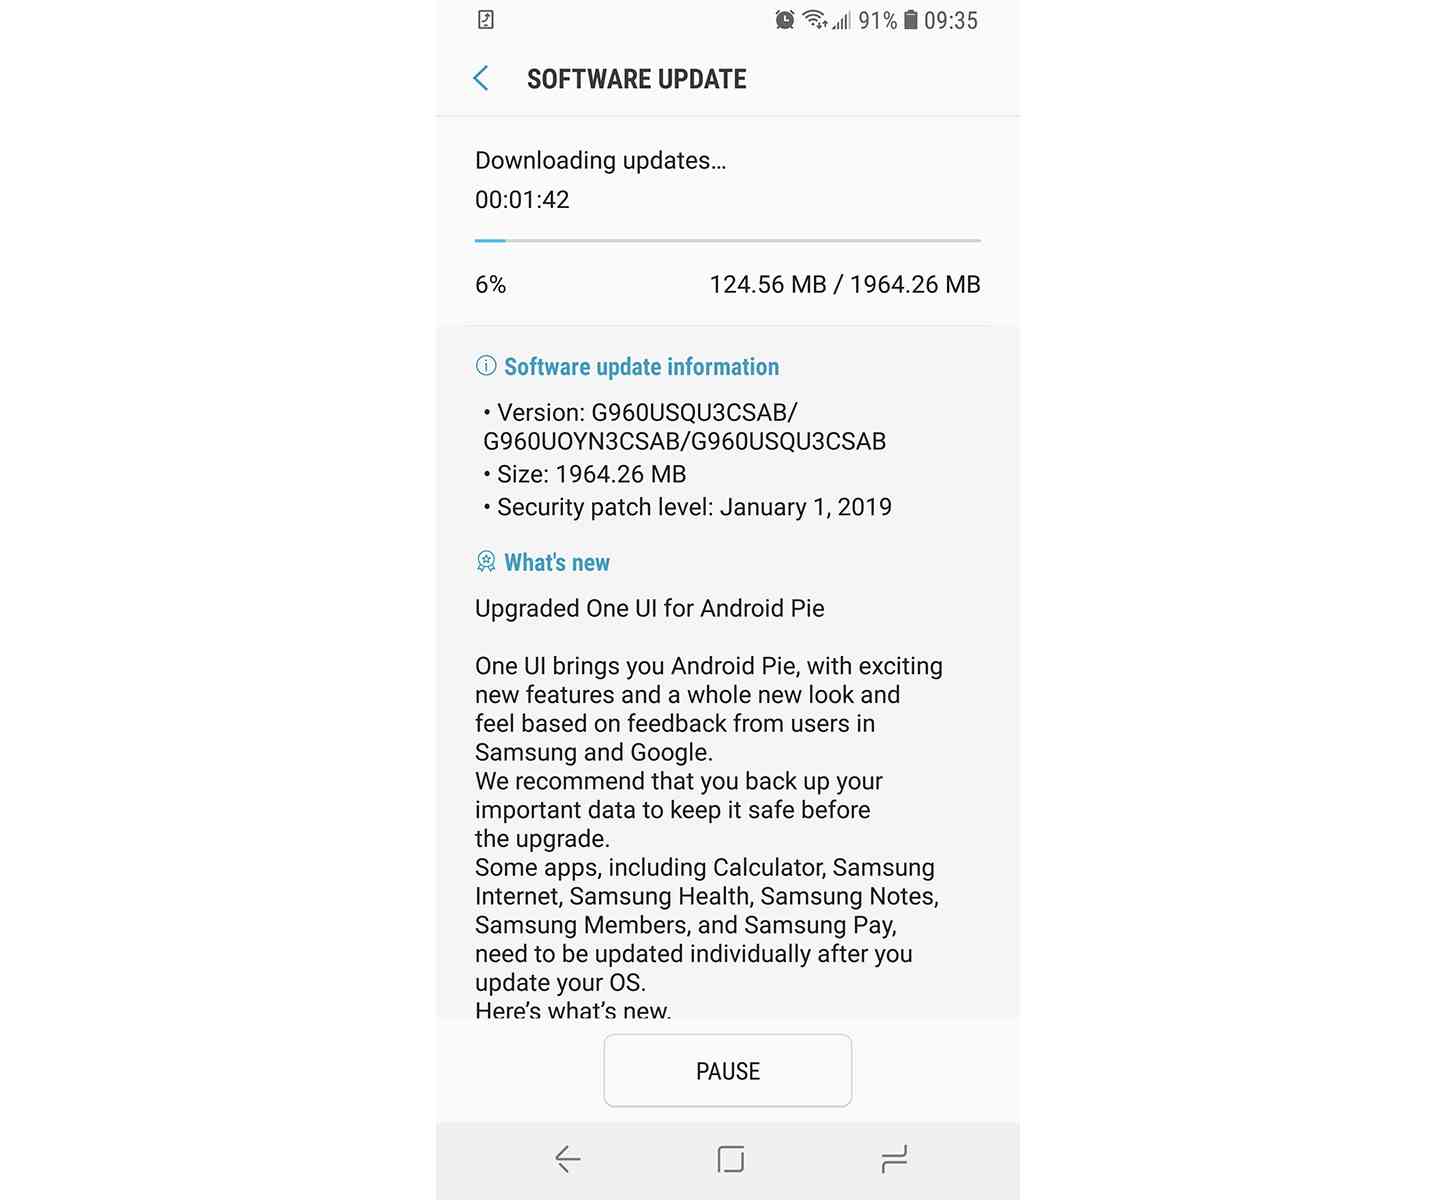
The One UI based on Android Pie for Galaxy S9 device comes with the updated February 2019 Security Patch. The One UI is purely made for customizations like one-handed operation, dark mode, Always-On Display etc.
- Added a new feature to turn on Night mode at a scheduled time.
[Settings -> Display -> Night mode -> Turn on as scheduled] - Improved stability -> Wi-Fi, NFC, Email, and Gesture.
- February Android Security Patch 2019.
Pre-Requirements:
- Download Samsung USB Drivers on your PC/Laptop.
- Take a full backup of your device at first.
- Keep your device battery juice at least up to 50%-70% for safer side.
- Enable USB Debugging and OEM Unlock option from the Developer options.
- A USB cable to connect with computer.
- Download Odin v3.13.1.zip file and extract it on your PC.
Please Note: This firmware files and guide is compatible with model no. SM-G960F (Galaxy S9) and SM-G965F (Galaxy S9+) devices only. Don’t try to install this ROMs on any other device model.
TheDroidTimes won’t be responsible for any error or damage occurs to your device while following this guide or firmware files. Do at your own risk.
Downloads:
- Samsung Galaxy S9 (Flashable)
- Model Number SM-G960F/FD Stable – G960FXXU2CRLI Firmware
- Model Number SM-G960U/U1 (US models) – G960USQU3CSAB Firmware
- Samsung Galaxy S9+ (Flashable)
- Model Number SM-G965F/FD Stable – G965FXXU2CRLI Firmware
- Model Number SM-G965U/U1 (US models) – G965USQU3CSAB Firmware
- Samsung Galaxy S9 (OTA Only)
- Model Number SM-G960U/U1 (Snapdragon) – Download
- Samsung Galaxy S9+ (OTA Only)
- Model Number SM-G965U/U1 (Snapdragon) – Download
Steps to Install Galaxy S9/S9+ Android Pie Update (One UI)
Method 1: OTA Package
- Download the One UI (Android 9 Pie) OTA file for your device from above.
- Now, connect your phone to the PC via a USB cable.
- Copy the downloaded OTA package to the root directory of the external storage on your device. [Keep the file without any folder]
- Disconnect your device from PC and switch off the phone.
- Now, boot into stock recovery mode. [press and hold the Volume Up + Bixby + Power buttons together on your Galaxy S9/S9+ until you will see a blue screen with Android logo]
- After booted into stock recovery, use the Volume buttons to select Apply update from SD card option and confirm it by pressing the Power button.
- Go to the SD card and select the One UI OTA update file.
- Select Yes to flash the update and wait for some time.
- After the process finished, select the Reboot system now option.
Method 2: Odin Flash
- Download the Galaxy S9/S9+ Android Pie (One UI) firmware and Odin v3.13.1.zip from the above link.
- Extract the downloaded firmware file on your PC/Laptop.
- Switch off your phone and press & hold the Volume Down + Bixby + Power buttons together until you see a warning screen.
- Now, press the Volume Up button to enter in Download Mode on your Galaxy S9/S9+ device.
- Connect your phone to the PC using the USB cable.
- Go to the folder where the Odin flash tool was extracted and launch the tool.
- The ID:COM port should highlight after your phone is successfully detected by the tool
- Now, click on the BL button in Odin and select the firmware file named BL_G960FXXU2CRLI for the Galaxy S9 model and BL_G965FXXU2CRLI for the Galaxy S9+ model.
- Do the same for AP, CP, and CSC and based on your compatible firmware files. [For the CSC, make sure to select the HOME_CSC option as well]
- Click on the Options tab in once all the files have been selected.
- Make sure to check Auto Reboot and F.Reset Time option also.
- Finally, click on the Start button to start the flashing process on your Samsung Galaxy S9/S9+ device.
Now, wait for a few minutes to flash the firmware completely. After the installation finished, you would see the confirmation message PASS! in the Odin window and your Galaxy S9/S9+ should reboot automatically in a new system.
Files Credit: TAS | TCD